
Unreal Engine 5
Chaos Motorcycle Leaning & Tuning
Build speed-based leaning and tune the motorcycle’s suspension, collision, engine, transmission, and steering.
About this tutorial
Welcome back to Part 3 of my Chaos Motorcycle series! In this tutorial, we take our motorcycle from simply working to feeling like a real sport bike. We’ll improve the riding experience by implementing realistic leaning, tuning the suspension, adjusting the engine and transmission, and refining the steering system for smooth, responsive handling.
- Create a realistic speed-based leaning system using Chaos Vehicle’s Target Rotation Control
- Tune the front and rear suspension for authentic sport bike behavior
- Fix wheel collision, friction, and raycast issues when leaning
- Configure the engine, transmission, torque curve, and gear ratios
- Improve steering with Single Angle mode, a custom steering curve, and responsive input settings
Building a realistic sport bike in Unreal Engine 5 Chaos Vehicle
How to tune leaning, suspension, engine, and steering so your Chaos motorcycle finally handles like the real thing.
If your Chaos motorcycle technically drives but still feels like a physics prop, this is the part where that changes. In this guide to building a realistic sport bike in Unreal Engine 5 Chaos Vehicle, we’ll take the vehicle from “just working” to feeling like a sport bike.
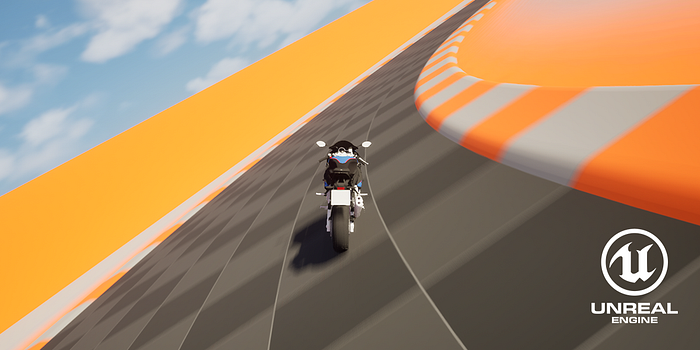
Setting up speed-based leaning with Target Rotation Control
Open the sport bike Blueprint and select the Vehicle Movement component. In the Details panel, search for arcade control. All of the leaning logic lives here.
The key piece is Target Rotation Control. As the name suggests, it’s a controller that continuously rotates the vehicle toward a target orientation. You define a desired angle, and the controller applies whatever torque is needed to reach it and hold it.
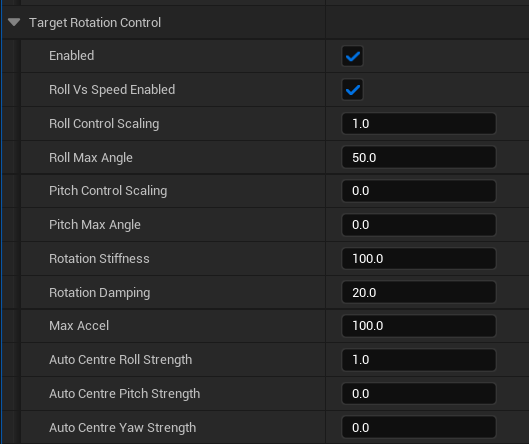
Enable Target Rotation Control and enter the values shown above. The Roll Vs Speed Enabled checkbox ties leaning to speed, so the bike won’t lean while stationary. Leave that off while setting up the leaning; the screenshot shows the configuration with it enabled.
| Setting | Value shown |
|---|---|
| Enabled | On |
| Roll Vs Speed Enabled | On in the screenshot |
| Roll Control Scaling | 1.0 |
| Roll Max Angle | 50.0 |
| Pitch Control Scaling | 0.0 |
| Pitch Max Angle | 0.0 |
| Rotation Stiffness | 100.0 |
| Rotation Damping | 20.0 |
| Max Accel | 100.0 |
| Auto Centre Roll Strength | 1.0 |
| Auto Centre Pitch Strength | 0.0 |
| Auto Centre Yaw Strength | 0.0 |
What each leaning parameter does
You can copy the numbers, but here’s the reasoning behind each setting:
- Roll Control Scaling — How strongly roll input maps to the roll target. If max roll is 45 degrees and scaling is 1, the bike leans the full 45. At 0.5, it leans about 22.
- Roll Max Angle — The maximum roll in degrees. I set this to 50, which suits a sport bike. We only rotate around the x-axis (roll), so pitch stays untouched.
- Rotation Stiffness — How aggressively the controller closes the gap between current roll and target roll. Set it too high and the bike snaps left to right, which looks fake.
- Rotation Damping — Slows the rolling speed as it approaches the target, making the lean look more realistic. Push it too high and leaning becomes sluggish.
- Max Acceleration — It caps the physical torque so a large angle error plus high stiffness doesn’t produce an impossible instant snap. Skip this ceiling and leaning won’t work at all.
- Auto Center Roll Strength — Set to 1, it constantly re-centers the bike to zero roll, which is natural for a motorcycle.
With these dialed in, you control the entire leaning behavior of the bike.
Tuning sport bike suspension in Chaos
Right now the suspension has two problems. It’s plushy and soft, which is correct for an off-road vehicle but wrong for a sport bike. And when you lift the bike, the suspension travel is huge, leaving an unreasonable gap between the lower legs and the top tube up front.
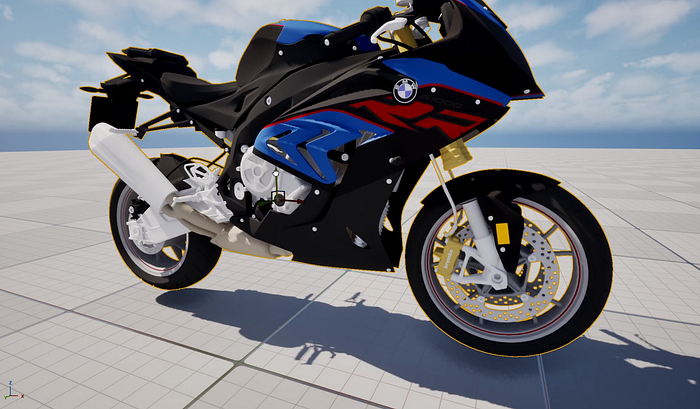
The single most important factor affecting suspension is vehicle mass, so fix that before touching anything else. The mass is currently set to 1500 kg, which is a car, not a motorcycle. This sport bike weighs around 200 kg in real life, so set it there. In simulation you’ll immediately see the spring is too strong and the travel problem gets even more obvious.
Front suspension
Open the front wheel class and find the Suspension section.
- Suspension Max Drop — Set to 0.2 to shorten downward travel. Now the upper tube sits at the top of the lower leg and won’t drop further.
- Spring Rate — Lower it to 200 to weaken the front spring.
- Spring Preload — Set to 0. Preload acts as pre-compression to raise ride height, which we don’t want on a bike.
Rear suspension
- Suspension Max Drop — Set to 5, which puts the shock absorber spring in a more natural position.
- Spring Rate — 200.
- Spring Preload — 0.
Fixing the wheel sinking through the ground
When the bike leans, the front wheel drops through the ground. Chaos detects the ground with raycasting. To see it, enable Chaos vehicle debug in the console, then draw the physics shapes.
p.Chaos.DebugDraw.Enabled 1
p.Chaos.Solver.DebugDrawShapes 1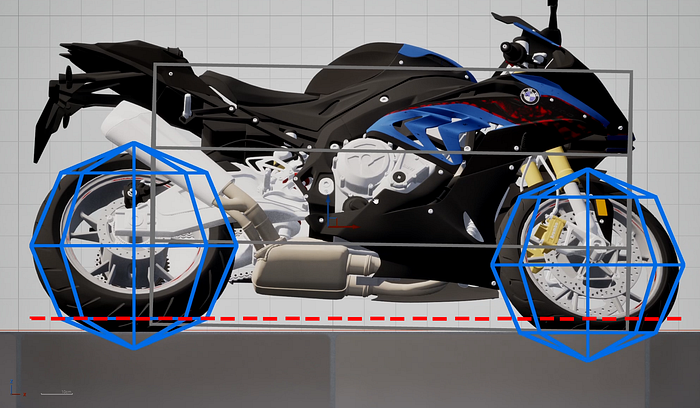
From a side view during a lean, the front shape sits at a different level than the back wheel. Open the front wheel Blueprint and you’ll find the sweep shape is set to Raycast. Because leaning uses two separate front wheels (one physical, one visual), raycast isn’t suitable here. Switch the shape to Spherecast and both shapes line up correctly during a lean.
Adding rear wheel friction
The rear wheel spins almost independently, like there’s no grip. Open the rear wheel and increase the Friction Force Multiplier. Rear friction should be higher than the front:
- Rear wheel: 8.
- Front wheel: 4.
Turn motion blur off with a console command. Spinning wheels look far better without it.
r.MotionBlur.Amount 0Fixing engine and transmission behavior
Even after friction, the wheel spins in place. When I first set up the bike, I added one key to the torque curve and set it to 1, meaning the bike always uses maximum torque. That’s not how a real vehicle behaves.
I have a separate tutorial on transmission and engine tuning covering this in full, so here are the numbers for this bike.
Search RPM and change the four values:
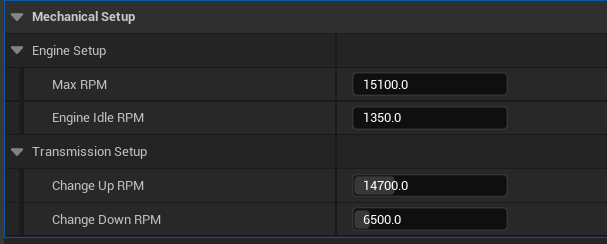
| Setting | Value |
|---|---|
| Max RPM | 15100 |
| Engine Idle RPM | 1350 |
| Change Up RPM | 14700 |
| Change Down RPM | 6500 |
Search ratio and update the final and gear ratios:
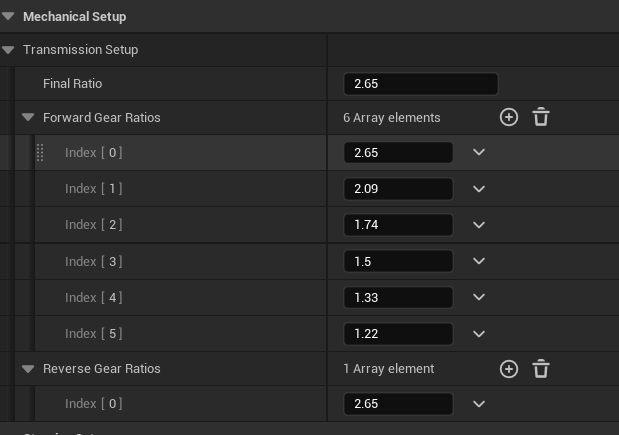
| Setting | Value |
|---|---|
| Final Ratio | 2.65 |
| Forward gear 1 | 2.65 |
| Forward gear 2 | 2.09 |
| Forward gear 3 | 1.74 |
| Forward gear 4 | 1.5 |
| Forward gear 5 | 1.33 |
| Forward gear 6 | 1.22 |
| Reverse gear ratio | 2.65 |
- Gear Change Time — Set to 0.05, since a sport bike shifts very quickly.
- Maximum Torque — Set to 115.
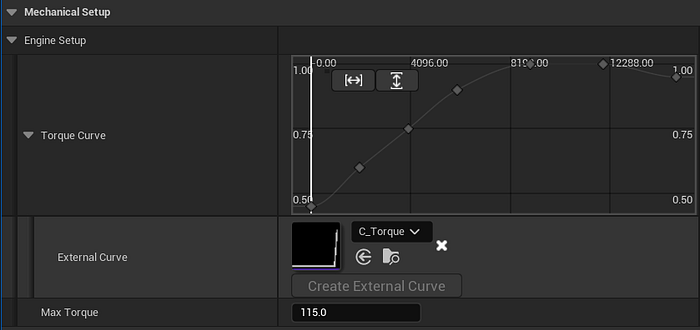
Then apply the torque curve:
| RPM | Normalized torque |
|---|---|
| 0 | 0.45 |
| 2000 | 0.6 |
| 4000 | 0.75 |
| 6000 | 0.9 |
| 9000 | 1 |
| 12000 | 1 |
| 15000 | 0.95 |
With these changes, the engine and transmission behave far more naturally.
Dialing in realistic sport bike steering
Right now the steering feels too sharp. A real sport bike has a low steering range that gets even tighter at higher speeds, so this sudden sharpness feels wrong.
- Open the front wheel Blueprint. In Wheel Setup, find Max Steering Angle. 50 degrees is far too much, so drop it to 15.
- On the Vehicle Movement component, search steer. The steering type is set to Angle Ratio. Change it to Single Angle. A motorcycle effectively has two steering wheels that don’t need different angles, so single angle gives correct bike behavior.
- Set up a steering curve. On the graph, the horizontal axis is speed in mph and the vertical axis is normalized steering. As speed rises, steering output should drop. Make an external curve for this.
| Speed (mph) | Normalized steering output |
|---|---|
| 0 | 1 |
| 5 | 0.75 |
| 10 | 0.55 |
| 15 | 0.42 |
| 20 | 0.35 |
| 30 | 0.28 |
| 40 | 0.22 |
| 60 | 0.16 |
| 80 | 0.12 |
| 120 | 0.08 |
| 180 | 0.05 |
Steering Input Rate
Under Steering Input Rate, set:
- Rise Rate: 8 — How fast steering responds when you start turning. Eight gives a smooth but responsive turn-in that feels like a sport bike without going twitchy.
- Fall Rate: 10 — How quickly steering returns when you release. Ten lets it recenter a little faster, keeping the bike stable and ready for the next input.
After tuning, the steering no longer feels sharp and weakens naturally as speed climbs.
A sport bike shouldn’t just work in the engine — every system, from lean to steer, has to agree that it’s a motorcycle.
Wrapping up
That’s the full pass: speed-based leaning through target rotation control, mass-corrected suspension front and rear, a sweep shape fix for leaning, proper wheel friction, natural engine and transmission values, and a steering system that tightens with speed. Individually these are small tweaks. Together they’re the difference between a vehicle that drives and one that feels like a real sport bike.
Resources and credits
🔗 Resources used in this video: https://sketchfab.com/3d-models/motorcycle-3834fb8c1fc748f19439f9bfaf1d89f3
📜 License / Credits: Some third-party assets are used in this tutorial. Full credit goes to the original creators.
3D Model: motorcycle – Sketchfab Author: https://sketchfab.com/gdev.swapon License: CC Attribution Source: https://sketchfab.com/3d-models/motorcycle-3834fb8c1fc748f19439f9bfaf1d89f3
Music
-
Chill - Chill Music - prettyjohn1 License: Free for use under Pixabay Content License Source: https://pixabay.com/music/beats-chill-chill-music-505125/
-
Shadowstep - CFL_TurningPages License: Free for use under Pixabay Content License Source: https://pixabay.com/sk/music/bije-shadowstep-422798/